12.09.2007

New Pictures!

It's been a while since I provided new photos, and any project like this is usually a work in progress. There's always so much cool stuff that can be done with a MAME cab. Anyway, here are the pics I took yesterday:


My cat, Mister Burns, takes City Connection seriously.


I recently installed a Guitar Hero clone, Guitar Zero. The Xbox 360 guitar works very well with it. Makes for lots of fun when we have people over.


The older pic of the motherboard showed my old Dell motherboard, my old USB WiFi adaptor, and a slew of cables everywhere, in no organized fashion. I organized the cables and mounted them to the chassis, and also replaced the WiFi adapter with straight ethernet. It's faster and more reliable, not to mention more secure. I have too much work wrapped up in this machine to leave it vulnerable to attacks. Also shown is the newish Biostar motherboard. It's a P4 3.0GHz machine with 512MB RAM, and seems to be more than enough power for what I'm using it for. I even think Zinc will run well on it. Hmmmm... more ideas......


Yes, the machine does take quarters, so pay up!

2.13.2007

At last! (Near) Completion!

I received my new motherboard/RAM/CPU the other day and installed it. After getting Windows XP up and running, I plugged in the ArcadeVGA card in and wired up the monitor to the VGA connector. More pics are on the way, but this made a world of difference! The games finally run in their native resolutions, and I couldn't be more pleased with how they look and feel now. Not to mention, some of the newer games, which had previously run sluggish, run at full speed with no delay whatsoever. The only work left now is to make some final tweaks to Windows and MameWah.


I also picked up my new marquee from the post office today and installed it. Wow.

I'll post more pics tomorrow night if I have time.

1.19.2007

More Progress!


I took all these pics this evening, so everything here is current as of today. I made a few improvements since the last pics, including:
  • New sheet of 1/4" thick plexiglass in front of monitor
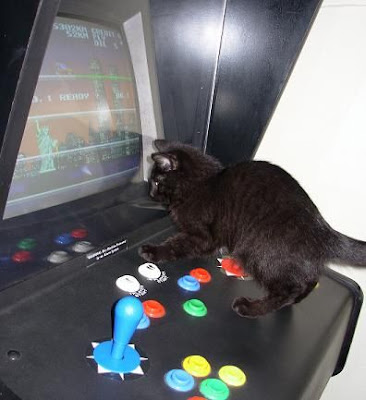
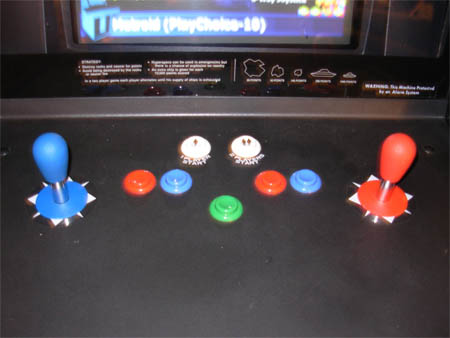
  • 5 buttons for each player
  • Built-in USB WiFi adapter
  • Replaced joysticks with Happ Competition sticks
  • Headphone jack on the underside of control panel
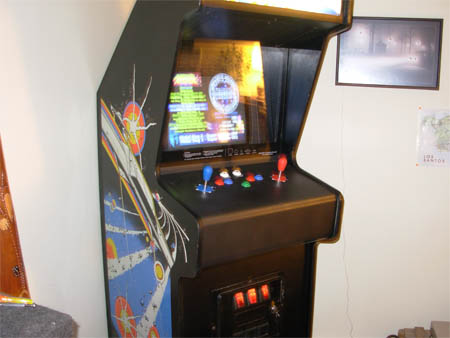
I need to do something for a border on the plexi sheet. As you can see in the pic below, the pine rails are exposed and looking a bit rough. I'm thinking about masking off most of the center on the back, painting a 1" black border around the entire sheet, and then spraying a topcoat to protect the paint job for when the plexi is removed for maintenance. Anyone have any other ideas?


Also, the new buttons are not 100% perfectly placed with each other. It doesn't look terrible, but I'm thinking about building an additional control panel over top of this one, and extending the new one by two or three inches on each side to allow a more ergonomic and spacious control panel.

If you look closely, you'll also notice that the joysticks are different than what I originally went with. In the beginning, I had used two Mag-Stiks from Ultimarc, which are a good idea in theory. The Mag-Stik is a joystick that uses magnets to snap the stick back to center, which is great because you don't have to ever worry about springs going bad. However, after playing tons of games on the machine, I realized I didn't like the responsiveness of the Mag-Stik at all. It had very limited movement, and always seemed to "stick" when trying to move in circular motions. This was a real pain when trying to play games like Pac-Man or Burger Time. So, after toiling over it, I opted to buy a pair of Happ Competition joysticks, which are spring-loaded and have a much more flexible feel to them. I haven't been able to blame my suckiness at Pac-Man on my controls ever since. ;)


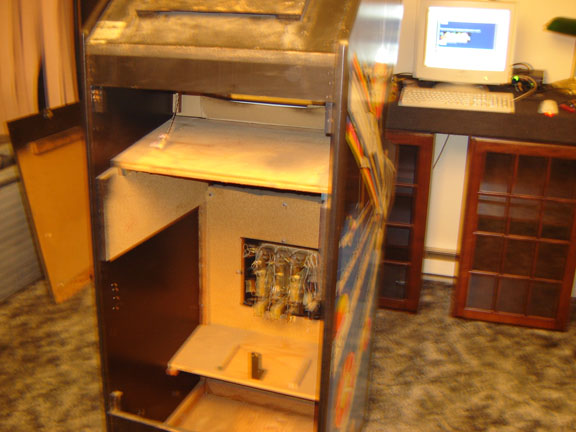
Now, let's have a look inside the cabinet, shall we?


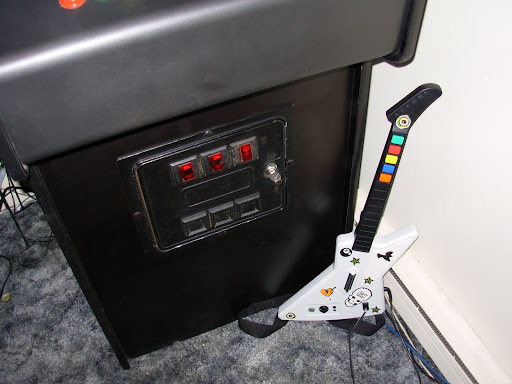
This is the inside of the coin door. I am considering getting a third coin mech, as this cab has three slots for coin mechs, something I found a bit odd for an Asteroids cab. The original light bulbs were long-since blown out, and I had surprisingly little trouble finding replacements. I took one out to K-Mart and found a replacement within minutes. Who knew? Also, the switches at the bottom of the mechs are wired to [NUM5] on the I-PAC board, which tells MAME that a coin has been inserted.

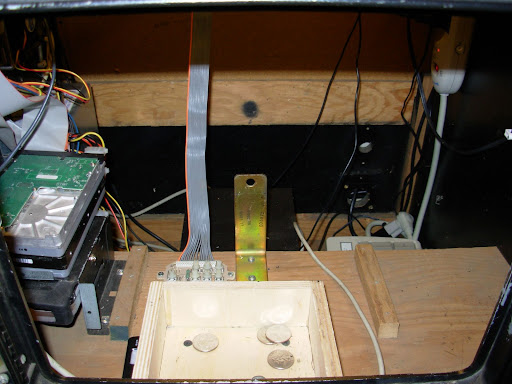
Here we have the internal USB WiFi adapter, which has proven to be extremely handy. I got some 1/2" plywood blocks from work and secured them to the interior end panel with some 1" brads. I angled the top block up a bit so that I can slide the adapter in and out with relative ease. The further back I push the adapter, the more securely it fits.

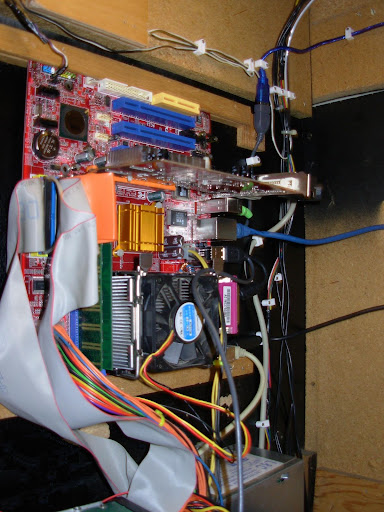
This last pic is the motherboard. You can't see it too well, but it's held in by pine mounting rails with routed slots about 5/8" from the edge . Luckily, the original board was secured in the same way, so all I had to do was pry the bottom rail off, cut the staples, and re-attach the rail to allow the motherboard to slide in and out. It holds very well, and makes for very little modification needed to the original cabinet construction.

That's all for today. I just put in an order with EMDKAY for a new marquee to replace the Asteroids one. I just got a phone call this afternoon from the local glass shop saying that my plexiglass sheets are ready to be picked up for my marquee, also. I'll post pics when I have the marquee assembled and installed. Till then, feel free to leave any comments. You don't have to be a registered user of this site to comment, either.

Updating the Blog


It's been a long time since I updated the blog, so here we go. I actually was very busy working on the cabinet and got very far with it. I am still doing minor changes and tweaks to the machine here and there. I suppose, though, it'd be best to start from the top.

After sanding down the old rusty and beat-up control panel, I re-painted it with three coats of Rustoleum Hammered Metal paint, which is perfect for any metal surface on arcade machines. The texture really turned out beautifully. Also shown is the underside of the CP, with the I-PAC interface and buttons shown.


Since the taking of this picture, I have added five new buttons per player, which makes newer games playable. More pics are on their way. You can also see in these pircures that I have installed a custom-cut monitor bezel to hide the ugliness of the monitor's metal frame.


You'll also notice that the coin door buttons light up. I went to K-mart and bought some replacement bulbs and then wired up all of them directly to a 5v power connector on the ATX power supply. The result is pure vintage arcade. More pics coming soon.

3.04.2006

Control Panel in the works


I installed two Mag-Sticks (from ultimarc.com) as well as several buttons. I had to replace the board under the control panel that holds the controls, as it was too small and didn't quite suit the project well. I got a new piece of 3/4" plywood from work, cut it down, drilled all the holes I needed, and mounted it to the underside of the panel. I then installed my joysticks and buttons, wired it all up to the I-PAC board, and started copying my ROMs to the hard drive.

I will have to rip all of the controls out again in a few days when I sand and re-paint the control panel. I'm thinking of going glossy black and putting some clear coat on it. I also have a lot of overlay stickers that will label each button and joystick for that authentic arcade feel.

You can also see in this picture that I've taken a monitor and mounted it in place of the original. I tore apart my 19" SVGA and seated it. It works great!

3.02.2006

Welcome home, Asteroids


Ever since I was a kid, I've always wanted to have an actual stand-up arcade machine. I finally decided to pick one up. I looked for a few months on the Internet, did some reading about converting old machines into MAME cabinets, and got absolutely (re)hooked on the idea. I picked up an Asteroids machine for around $180 including extra buttons, decals, an I-PAC board, and lots of good advice and suggestions for my project. Couldn't have found a better seller!

My friend Josh and I lugged it into my apartment (good thing I'm on a ground level apartment) and instantly started really checking it out. Since then, I've been working on it almost every day. It's progressing quite nicely, but still has a ways to go.


Here's how it looked when I got the back open. As you can see, the construction is in tip-top shape, and the empty case leaves me lots of room to work with. Time for some internal modifications!